I’ve spent a lot of mornings digging into garden beds with my hands to figure out what the soil is really like. Laboratory tests are useful, but most of the time you don’t need one to make better decisions for your plants. In five minutes and with nothing more than a little soil, water and your fingertips, you can tell whether you’re working with clay, sand or loam — and choose the right amendment to fix common problems. Here’s how I do it and what I recommend for each texture.
Why soil texture matters
Soil texture — the relative amounts of sand, silt and clay — controls drainage, aeration, nutrient-holding capacity and how easy it is for roots to grow. I always tell people: you can buy the best compost, seeds or plants, but if the texture is wrong for your plant’s needs you’ll keep fighting problems like waterlogging, poor root growth or nutrient deficiency.
The quick feel test (five minutes)
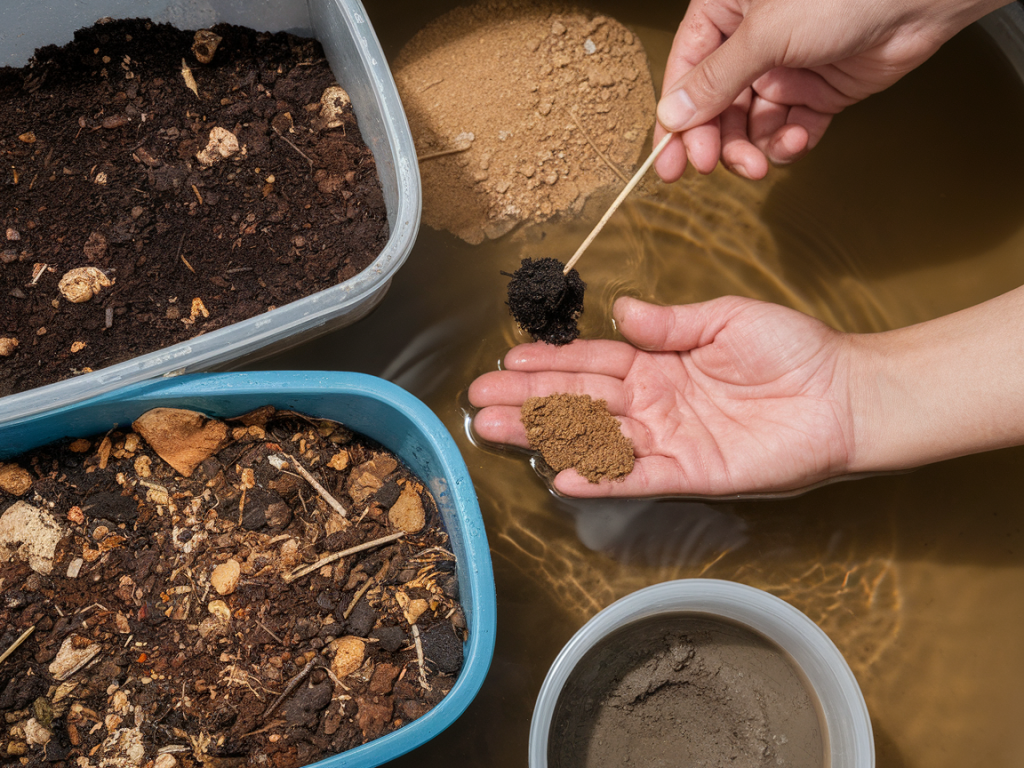
Stand next to the bed, take a small handful of soil from 2–6 inches below the surface (that’s the root zone for many plants), and follow these simple steps. You’ll need a little water and a small flat surface or your knee.
- Pinch a golf-ball-sized sample and remove roots or obvious debris.
- Crush any large clods so the soil is relatively fine.
- Add a few drops of water (about the amount to make it damp but not dripping) and knead it with your thumb and fingers for 20–30 seconds.
- Form a ball and try to roll it into a short ribbon between your thumb and forefinger. Also note how it feels in your fingers.
Here’s how to interpret what your hands tell you:
| Test result | What you feel | Likely texture |
|---|---|---|
| Falls apart, gritty, doesn’t stick | Sand grains visible, coarse feeling | Sand |
| Forms a weak ball but won’t ribbon | Smoother than sand, slightly powdery | Silt or silty loam |
| Forms a firm ball, ribbons 1–2 inches | Plastic feel, slightly sticky | Loam or clay loam |
| Very sticky, forms long ribbon (>2 inches) | Can be molded like clay; very sticky when wet | Heavy clay |
Signs I look for beyond the ribbon test
- Drainage: Dig a hole about 12 inches deep, fill with water and see how long it drains. More than 6–8 hours between refills and it’s probably heavy clay.
- Smell: A sour or rotten odor in wet soil often means poor aeration — typical of compacted clay or poorly drained areas.
- Root behavior: Roots circling near the surface or shallow rooting can indicate a hardpan or compacted layer.
- Surface crusting: Fine silt or clay soils often crust after heavy rain and impede seedling emergence.
How to choose amendments for each texture
Once you know your texture, the goal is to improve structure and function. Below are my go-to approaches for sand, clay and loam.
For sandy soil
Sandy soil drains quickly and feels gritty. It warms fast in spring but can’t hold nutrients or water well. I think of sandy soil as a sponge with big holes — great for bulbs and Mediterranean plants, less good for thirsty vegetables unless amended.
- Organic matter is your best friend: Add generous quantities of compost, well-rotted manure or leaf mold. I aim for 2–4 inches of compost worked into the top 6–8 inches of soil. Compost increases water- and nutrient-holding capacity.
- Use water-retaining amendments if needed: Products like coir (coconut fiber) or water-absorbing crystals can help in pots or very sandy beds. I use coir in raised beds and save crystals for containers where water stress is a recurring problem.
- Mulch heavily: A 2–3 inch mulch of straw, bark or leaves slows evaporation and builds organic matter as it breaks down.
- Slow-release fertilizer: Because nutrients wash away, choose slow-release or regular light feedings rather than one big dose.
For clay soil
Clay packs together, holds water and can suffocate roots when it’s wet. But clay is also nutrient-rich and, once improved, can be very productive. I’ve turned challenging clay patches into flower beds by focusing on structure and biology.
- Add lots of organic matter: Compost and well-rotted manure are essential. I recommend 2–3 inches of compost worked into the top 8–12 inches. Over time this creates crumb structure and improves drainage.
- Avoid over-tilling: Tilling can temporarily loosen clay but creates a fine, compactable texture if done when wet. Instead, double-dig once if necessary and then focus on surface amendments and mulching.
- Use gypsum selectively: Gypsum (calcium sulfate) can help some sodic clays by flocculating clay particles, improving structure. It’s not a cure-all — test or consult local extension advice before using it.
- Create raised beds: If drainage is a chronic problem, build raised beds with a good depth of well-amended soil. This is the quickest way to give roots better conditions without reworking the entire yard.
- Plant selection: Choose plants tolerant of heavier soils (e.g., daylilies, sedges, many shrubs) while you improve structure for more demanding plants.
For loam (the sweet spot)
Loam — a balanced mix of sand, silt and clay — is what many gardeners dream of. It holds moisture and nutrients while draining well. Even so, loam benefits from regular care.
- Keep adding organic matter: A yearly top-dressing of compost (about 1/2–1 inch) keeps soil biologically active and crumbly.
- Maintain mulch: Mulch moderates temperature and moisture and feeds the soil as it breaks down.
- Avoid compaction: Don’t work loam when wet and avoid walking repeatedly on beds; use stepping stones or paths.
- Balanced fertilization: Loam usually needs only occasional nutrient top-ups based on plant needs; use soil tests if you suspect deficiencies.
Troubleshooting common problems
- Soil stays soggy after rain: You probably have heavy clay or a compacted layer. Improve drainage with organic matter, consider a raised bed, and avoid compacting the soil further.
- Plants wilt between waterings: Sandy soil could be the cause. Increase organic matter and mulch, and consider slow-release fertilizers to reduce leaching.
- Seedlings have trouble emerging: Surface crusting from silt or clay can be the issue. Lightly loosen the top layer and use a fine mulch of straw to protect young seedlings.
- Patches with poor growth only in places: Look for buried debris, old concrete, or a compacted layer. Breaking through the hardpan or creating a raised bed often fixes the spot.
My favourite products and tools
I often recommend a few practical items that make the job easier:
- A hand trowel and soil knife — for quick digs and sampling.
- High-quality compost — either home-made or a good screened municipal compost; I’ve had good results with local compost brands because they’re tailored to regional needs.
- Coir or well-rotted manure — coir is especially useful in raised beds and containers.
- Gypsum — sensible where local advice says it can help clay structure; don’t use indiscriminately.
If you’re unsure, test one small area first: improve soil in a single bed, observe for a season, and you’ll have a good sense of what works. Hands-on tests like the ribbon test are fast, intuitive and surprisingly reliable — and they give you the confidence to choose amendments that really improve plant health.