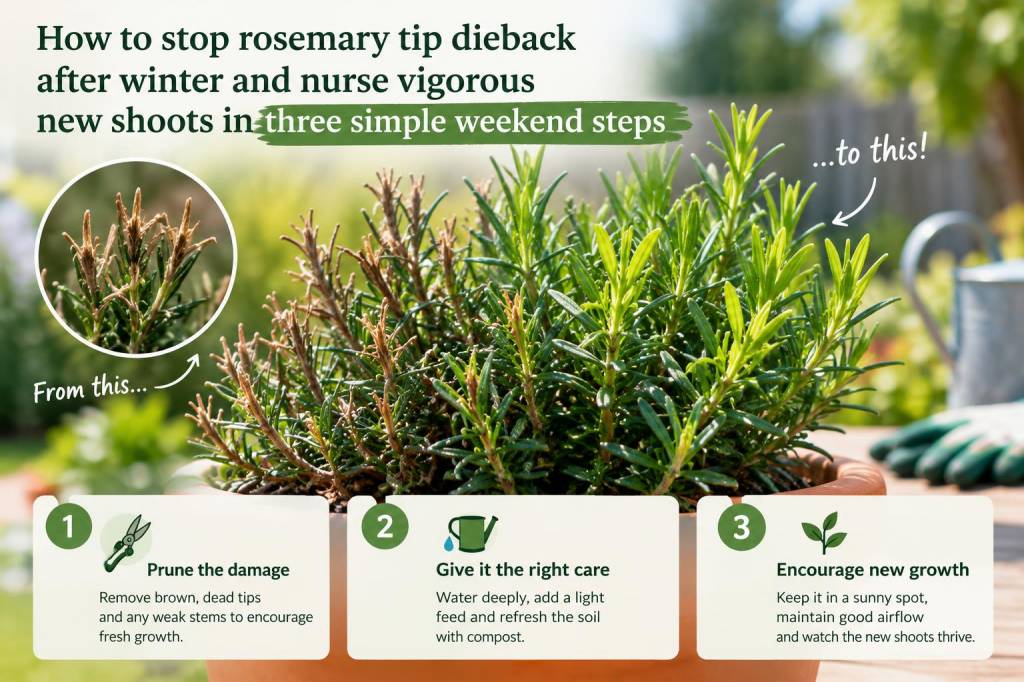
Winter can be hard on rosemary. After a few cold snaps or a long stretch of damp weather I often find my rosemary plants looking sparse at the tips, with brown, shriveled growth that seems to stop new shoots from forming. Over the years I've learned that a gentle, focused approach over a single weekend can revive a frost-bitten rosemary and set it up to push vigorous new growth through spring. Below I share the simple three-step routine I use—practical actions you can complete in one weekend, with explanations so you understand why each step matters.
Why rosemary tip dieback happens (and why panic is the worst response)
Rosemary is evergreen and hardy, but it doesn’t love sitting in cold, wet soil or being repeatedly frozen and thawed. Tip dieback after winter usually shows as browned tips or thin, woody stems with no soft green growth at the ends. Common causes are:
Frost and freeze damage to young, tender shoots.Winter waterlogging leading to root stress and reduced vigor.Sunscald or sudden temperature swings that damage leaf tissue.Natural seasonal dieback where old growth thins and the plant needs a nudge to produce new shoots.When I first see browned tips, my instinct is to assess rather than prune wildly. Cutting into potentially alive wood too early removes the tissue that might push new shoots. Instead, I follow a patient but decisive weekend plan: tidy, check roots and soil, and a targeted prune and feed to encourage basal shoots.
Weekend step 1 — Clean and inspect (2–3 hours)
Start by cleaning the plant and your workspace. I like to do this on a dry day so foliage and soil aren’t sodden.
Remove debris and dead leaves from around the base to improve airflow and reduce pests.Brush off flaking bark and loose dead bits with a soft hand brush—don’t force it; you don’t want to damage potentially live tissue.Gently run your fingers along a few stems. Live rosemary stems are slightly flexible and have green or pale wood beneath the outer layer; dead stems snap and look brown and dry inside.If the plant is in a pot, lift it slightly to check drainage holes aren’t blocked and that the rootball hasn’t become waterlogged.While inspecting, note where the green tissue transitions to brown. I mark that area mentally (or lightly with a stake) so I know how much to prune later. This step prevents over-pruning and preserves the healthy wood that will regenerate.
Weekend step 2 — Improve soil and drainage (2–4 hours)
A lot of tip dieback traces back to poor soil conditions. Rosemary needs free-draining soil and a modest nutrient boost after winter to restart growth. Here’s what I do:
For in-ground plants: fork around the root area carefully to loosen compacted soil about 10–15 cm (4–6 inches) out from the crown. Avoid cutting through roots. Mix in a few handfuls of sharp sand or grit and a light sprinkling of well-rotted compost. This improves drainage and adds gentle fertility.For potted rosemary: if the plant is root-bound or the compost smells sour, consider repotting into a pot one size larger using a free-draining mix (equal parts potting compost, horticultural grit/perlite, and a little loam). If repotting isn’t needed, remove the top 2–3 cm of old compost and replace with fresh, airy mix.Add a mulch layer around the base of the plant—only 2–3 cm—using coarse grit or small gravel rather than organic mulch. This keeps crowns dry and reduces winter rot risk.Improving drainage is the long-term fix that stops repeated dieback. If your garden soil stays wet for days after rain, use raised beds, amend with grit, or choose a sunnier site for future plantings.
Weekend step 3 — Targeted prune and feed (1–2 hours)
Only after I’ve confirmed where live wood begins do I prune. My pruning rule: remove dead tips, preserve any green growth, and encourage low basal shoots rather than cutting into old, woody stems.
Using clean, sharp secateurs, cut back to just above a set of healthy buds or green tissue. If a stem is entirely brown, cut it back to where a tiny hint of green remains or to the main framework of the plant.Avoid shearing into old wood where there’s no green—rosemary can struggle to regrow from very old, woody stems.After pruning, give the plant a gentle feed. I prefer a balanced, slow-release granular fertilizer (for example, Osmocote or a general-purpose 10-10-10), applied sparingly around the drip line and watered in. An alternative is a liquid seaweed feed (e.g., Neptune’s Harvest or a kelp concentrate) diluted to label strength; it encourages root function and new shoots without pushing weak stretch.If the plant looks very brittle or shows signs of root disease (mushy base, foul smell), apply a biological soil conditioner with beneficial microbes (products containing Bacillus spp. or mycorrhizae) to help restore root health.After feeding, keep watering regular but moderate—let the top few centimetres dry between waterings. Too much moisture now encourages fungal issues; too little will slow recovery.
Extra care and timing tips I swear by
Wait until the worst of frosts has passed before pruning hard. Prune too early and new shoots may freeze; prune too late and you’ll lose the window for spring flush.Prune on a dry day to reduce disease risk. Clean tools between cuts with rubbing alcohol or a 10% bleach solution if you’ve worked on diseased plants.Consider light companion planting—near lavender or thyme—to create a better microclimate and boost pollinator visits later in the season.If you have several damaged plants, stagger your interventions over two weekends so you can monitor progress and avoid overfeeding everything at once.I’ve revived many rosemary plants with these three simple weekend tasks. The first signs of success are tiny green buds low down and a gradual steadying of new shoots over the next few weeks. With a bit of patience and the right care, your rosemary will recover and reward you with fragrant leaves and a bushier form ready for the summer kitchen.