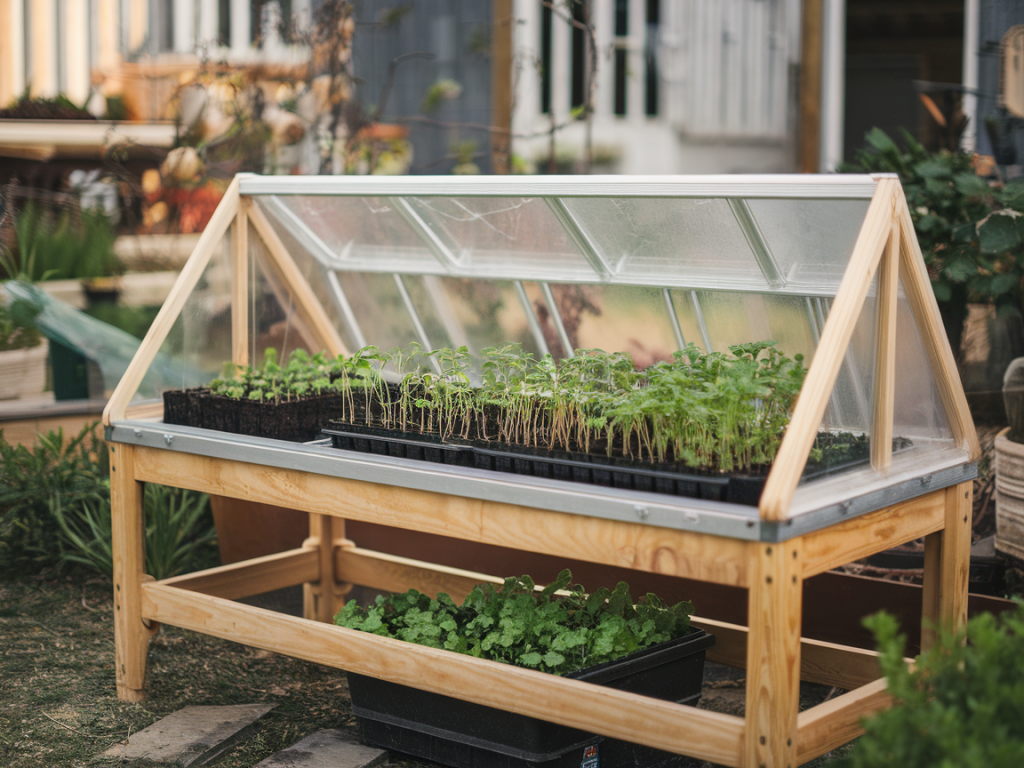
I kept a small Ikea bench for years because it was sturdy, inexpensive and had a perfect footprint for my narrow potting corner. When frost started creeping earlier in autumn, I looked at that bench and thought: why not transform it into a cold frame to get hardy seedlings going earlier and protect winter crops? The result was a cosy, budget-friendly retrofit that’s now one of my favourite winter garden hacks. Below I’ll walk you step-by-step through how I converted an Ikea Hackney-style bench into a functional winter cold frame for hardy seed starting and protection.
Why retrofit a bench into a cold frame?
Cold frames are brilliant: they capture solar heat, protect young plants from wind and frost, and extend your growing season with minimal cost and maintenance. Using an old bench gives you a raised structure at a comfortable working height, better drainage underneath, and a compact footprint ideal for patios and small yards. I also love repurposing — it’s eco-friendly and keeps useful items out of landfill.
What this cold frame can do
Materials and tools
Below is what I used. You can adapt to what you have — the idea is to make a removable, insulated lid that lets in light.
| Materials | Notes |
| Ikea Hackney bench (or similar) | Any sturdy wooden bench with slatted seat works |
| Clear polycarbonate sheet or twinwall polycarbonate panel (approx. lid size) | Better than single-pane glass for insulation and safety |
| Hinges (2 short butt hinges) | Stainless or galvanized for outdoor use |
| Weatherstripping or foam tape | For sealing the lid edges |
| Exterior wood screws | Stainless or coated |
| Wood glue (exterior) | Optional, for reinforcing |
| Black landscaping fabric or old roofing felt | For lining the interior and improving heat retention |
| Thermometer (optional) | To monitor internal temps |
| Paint or waterproofing stain | For protecting exterior wood |
Prep and planning — what to check before you start
First, check the bench’s condition. If it's creaky or has loose joints, tighten and reinforce with screws and glue. You want a solid base because the lid will be handled frequently. I replaced a couple of screws and re-glued a joint on my bench before starting.
Measure the top surface where the lid will sit. My bench seat was 100 cm x 40 cm — the polycarbonate lid was cut 2 cm shorter on each side to leave a small gap for ventilation and to account for weatherstripping.
Step 1 — prepare the lid frame
I prefer a framed lid rather than a bare panel: the frame gives the polycarbonate a place to sit, protects the panel edges and provides somewhere to attach hinges.
Step 2 — attach the polycarbonate
Polycarbonate expands and contracts, so don’t screw directly through the panel without allowing movement.
Step 3 — hinge the lid to the bench
Mark where the hinges will attach — I fit them at the back edge so the lid tilts open towards me. Pre-drill pilot holes into both the bench back rail and the lid frame.
Step 4 — seal and insulate
To keep warmth in, I line the interior seat area with black landscaping fabric (it absorbs heat) and add a thin layer of rigid insulating foam beneath if I’m overwintering sensitive plants. Attach weatherstripping around the lid contact surface — this reduces draughts and increases efficiency.
Step 5 — ventilation and temperature control
Cold frames can overheat in strong sun. I cut a simple wooden prop (a baton with notches) to hold the lid open a crack during the day. You can also install automatic vent openers (hydraulic arms that expand above a set temperature) — I use one on my larger frames and it’s a real time-saver.
Planting and use tips
Here’s how I use the bench-turned-cold-frame through the season:
Maintenance and winter-proofing
Common questions I get
Will the polycarbonate yellow or cloud? Quality twinwall polycarbonate resists UV and should stay clear for several years. Keep the protective film on until installation to avoid scratches.
Can I use glass instead? Yes — but glass is heavier, can shatter and offers less insulation than double-wall polycarbonate. If you use glass, make sure the frame and hinges are heavy-duty.
How much warmer will it be inside? That depends on sun and insulation, but I typically see daytime internal temps 5–10°C warmer than ambient on sunny winter days. Nights will still drop, so expect to protect very tender seedlings.
Is this suitable for all benches? It works best with benches that have a solid rim or back rail to fit hinges. Slatted seats need a plywood or timber base added so soil/containers don’t fall through.
Dimensions and quick reference
| Bench top | Measure your bench; leave 1–2 cm clearance for lid |
| Lid frame depth | 30–50 mm (enough to accept the polycarbonate edge) |
| Hinge type | 2 exterior-rated butt hinges |
| Ventilation | Prop stick or automatic vent arm |
This little retrofit gave my winter gardening routine a boost — I now get healthier, earlier starts on brassicas and a more controlled environment for overwintering pots. It’s an easy weekend build, inexpensive if you already own the bench, and it makes excellent use of that awkward, narrow space near a wall or under a south-facing window. If you try it, tell me what plants you’re starting — I’m always excited to swap tips on seed mixes and timings.