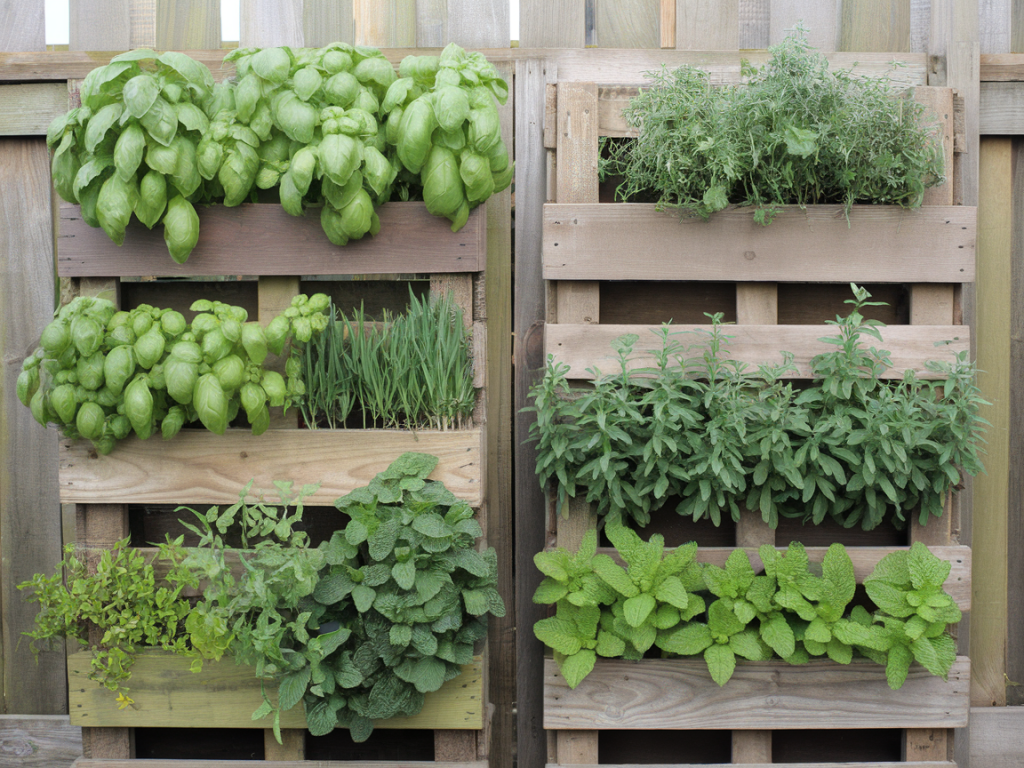
I love turning simple materials into useful garden features, and a recycled pallet vertical herb garden is one of my favorite weekend projects. It’s cheap, stylish, space-saving and—when built well—surprisingly durable. Below I’ll walk you through how I build one that lasts, step by step, including materials, construction tips, planting ideas and maintenance. I write this from my own experience, with small adjustments that made my pallets stand up to weather and heavy use.
Why a pallet herb garden?
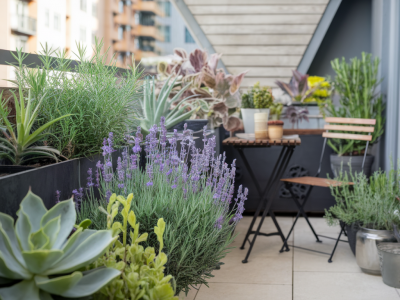
Pallets are everywhere: restaurant suppliers, garden centres, even some grocery stores will give them away. A vertical pallet garden is perfect if you have limited space (balcony, small yard, or sunny wall), want instant visual impact, and like the idea of upcycling. Herbs are forgiving, productive, and look great spilling out of slatted wood. The trick is to prepare the pallet properly so it doesn’t rot, warp or leak soil everywhere.
Materials and tools
Here’s what I use for a sturdy, long-lasting pallet herb garden:
For planting:
Choosing and preparing the pallet
Not all pallets are equal. Ask the supplier what the pallet was used for and check for stamps. Look for an "HT" stamp (heat treated), which indicates it’s been heat-processed rather than chemically treated. Avoid any marked "MB" (methyl bromide) or with suspicious stains and strong smells.
Next, inspect the pallet for loose nails, splinters, or cracked boards. Tighten any loose boards with a drill and add a few galvanized screws through the back into the slats if necessary. I often reinforce the corners with small metal brackets for extra rigidity—vertical gardens experience more torque when filled with soil.
Waterproofing and reinforcing
To make the pallet last, add a barrier between the wood and the soil. You can either line the pallet with heavy-duty pond liner (which is watertight) or with landscape fabric (which allows some airflow and drainage). I prefer a layered approach:
If you use pond liner, punch small drainage holes where you want water to escape. Remember: herbs don’t like to be waterlogged, so drainage is essential. Use galvanized staples so they don’t rust.
Filling and planting
When the pallet is lined and secured, tip it so the slats are horizontal and you can work into each pocket. Fill each pocket with a light, well-draining potting mix—don’t pack it too tightly. I like to mix 60% good-quality compost-rich potting mix, 20% perlite and 20% homemade compost. This mix gives nutrients while keeping the weight down.
Planting layout tip: place larger, vining or trailing herbs lower down (e.g., oregano, thyme, creeping rosemary) and taller herbs (rosemary, sage) toward the middle or top so they don’t shade others. If your pallet will hang on a sunny wall, orient sun-loving herbs on the side that receives most light.
| Herb | Light | Notes |
|---|---|---|
| Basil | Full sun | Fast-growing, harvest frequently to keep bushy |
| Thyme | Full sun | Drought-tolerant, great for slats |
| Oregano | Full sun | Spreads—plant lower |
| Parsley | Partial sun | Taprooted—deeper mix helps |
| Rosemary | Full sun | Woody—needs larger pocket or pot |
| Mint | Partial sun | Very invasive—contain in pots if needed |
Mounting and stability
Decide whether your pallet will stand against a wall or be fixed permanently. For a freestanding pallet, build a simple rear support: a pair of 2x4 legs screwed to the back at an angle stabilizes the structure. For wall mounting, use strong brackets or a cleat system. I prefer a French cleat: screw one half to the wall and the other half to the back of the pallet, then hang it securely. Use heavy-duty anchors suitable for your wall type if you’re fixing into masonry.
Watering and irrigation
Watering a vertical pallet can be uneven if you hand-water from the top. Two good options:
Mulching the top of each pocket with a thin layer of compost or chopped bark helps retain moisture and reduces watering frequency.
Seasonal care and maintenance
To keep the pallet lasting for years, reapply a coat of exterior wood stain or sealant every 1–2 years. Check for soft spots or rot annually—replace any damaged boards early to stop deterioration. Trim herbs regularly to encourage bushier growth and remove any dead or diseased foliage promptly.
In cold climates, consider moving a pallet to a protected area in winter or wrapping it in breathable frost cloth. Some herbs (rosemary, thyme) are hardy; others (basil, parsley) might need protection or to be replaced each season.
Troubleshooting common problems
If soil keeps falling out: add a thin wire mesh across the slats and staple it behind the fabric, or add an extra strip of wood to create a deeper pocket. If the pallet smells or shows mould: improve drainage, reduce watering frequency and ensure there’s airflow behind the pallet. If the pallet warps: it may be overloaded—use a lighter mix and avoid heavy clay soils.
Building a pallet herb garden is a satisfying mix of creativity and practicality. Once mounted and planted, it becomes a living wall that feeds you, invites pollinators and adds instant charm to any outdoor space. If you try one, experiment with different herb combinations and let me know what worked for you—I’m always swapping planting ideas and troubleshooting tips on Groupegarden.