I love a quick, satisfying project that turns an ordinary weeknight into something green and useful. Recently I took three inexpensive supermarket herb pots—those basil, parsley and chive plants that look a little tired in their plastic cups—and turned them into a layered balcony herb garden that looks intentional, saves water and gives me fresh herbs every day. If you have a small balcony or even a sunny windowsill, you can do this in an evening with minimal tools and materials.
Why layer and why it saves water
Layering containers isn’t just about looks. When you group herbs in tiers—taller at the back, spreading or trailing in front, and shallow-rooted or moisture-loving plants in mid-level pots—you create microclimates. Taller plants provide light shade, larger pots hold water longer, and a well-planned arrangement reduces evaporation. I also use mulches and saucers so water goes into the roots, not onto hot pot rims. The result: fewer waterings and healthier herbs.
What you’ll need (mostly from the supermarket and a hardware shop)
- Three supermarket herb pots (I used basil, parsley and chives).
- One medium container (20–25 cm / 8–10 in diameter) and two smaller containers of varied heights — choose lightweight terracotta-look fiberglass or resin if you’ll move them often.
- Quality potting mix — I like a light, airy mix with added compost; brands such as Espoma Organic Potting Mix or any local organic potting soil work well.
- Lightweight stones or broken terracotta for drainage if the new pots don’t have large holes.
- Mulch (coarse compost, shredded bark or even coarse perlite).
- A saucer or tray to capture runoff and keep the balcony clean.
- Optional: a simple drip reservoir or self-watering insert if you travel.
Step-by-step: evening makeover
I do this in stages so it fits a weeknight. Set aside about 60–90 minutes and a small music playlist.
1. Inspect and prune
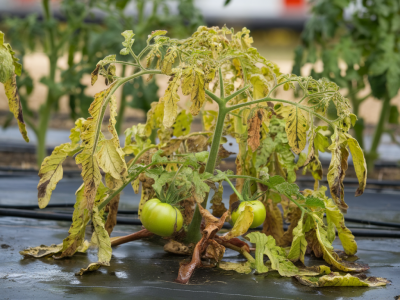
Open each supermarket pot and remove yellow leaves and the top third of any leggy stems. This reduces stress and encourages bushier regrowth.
2. Choose your pots and layout
Decide on the tiered arrangement: place the largest pot at the back (or center if it’s a circular balcony), a medium in front-left and a lower pot front-right. I positioned basil at the back because it can get taller, parsley in the mid pot and chives in the shallow front pot where they’ll spread and look neat.
3. Prepare the pots
Add a 2–3 cm (1 in) layer of lightweight stones in the bottom of each pot to prevent soil loss through drainage holes and to create an air gap that slows drainage slightly—useful for water retention on hot days.
4. Mix and fill
Mix your potting soil with a handful of compost or a slow-release organic fertiliser. When transferring the herbs, tease open the root ball gently. If roots are tightly wound, loosen them with your fingers; do not cut unless roots are circling badly. Fill pots so the crown of each plant is level with the rim—too deep and stems can rot.
5. Mulch and top-dress
Add a 1–2 cm mulch layer. Mulch reduces surface evaporation and keeps the soil cooler. Coarse materials like shredded bark or coarse compost work best for herbs because they allow air flow while conserving moisture.
Watering strategy that actually saves water
Here’s how I water to use less water while keeping herbs happy:
- Water deeply but infrequently. Give each pot a slow, deep soak until water runs out the drainage holes; this encourages deeper roots that are drought-tolerant.
- Use saucers to collect runoff and reuse it for a quick top-up on the next watering rather than letting it drain away.
- Check moisture with your finger or a small moisture meter: only water when the top 2–3 cm (¾–1 in) is dry for Mediterranean herbs like rosemary or basil. Parsley likes a little more moisture.
- In hot weather I water in the evening or very early morning to reduce evaporation loss.
| Plant | Preferred moisture | Typical watering cadence (seasonal) |
| Basil | Evenly moist, not waterlogged | Every 2–4 days in summer, weekly in cooler months |
| Parsley | Moist soil | Every 2–3 days in heat, less in mild weather |
| Chives | Moderately moist | Every 3–5 days depending on sun and wind |
Optional water-saving upgrades
- Self-watering inserts: small capillary wicks or pots with reservoirs (I’ve used Lechuza inserts) keep soil moist for longer and are great if you travel for a weekend.
- DIY drip reservoir: place a filled water bottle, neck down, into the soil after drilling small holes in the cap. It slowly releases moisture.
- Use greywater carefully: captured shower water (unscented soap) can water non-edible ornamentals; for herbs intended for eating, stick to clean water.
Companion planting and practical tips
Think of your tier as a mini-ecosystem. Basil repels certain pests and pairs well with tomatoes, parsley attracts beneficial insects and chives can deter aphids. Keep these practical points in mind:
- Rotate where you cut: pinch leaves from the top and sides to promote bushiness—never remove more than 30% of the plant at once.
- Harvest regularly: herbs that are used grow better; harvesting reduces the need to prune and keeps plants producing.
- Watch for pests: sticky leaves or deformed growth are early signs. A gentle spray of water or insecticidal soap (organic) often solves small aphid populations.
- Fertilise lightly: a fortnightly liquid feed in summer or a single application of slow-release organic fertiliser in spring keeps nutrients steady without excess salts that dry soil can concentrate.
Troubleshooting common problems
If basil turns black at the stem base it may be overwatered or sitting in cold, wet soil—allow surface to dry, remove soggy mulch and check drainage. If chives look floppy, they may need more light; move them to a brighter spot or rotate the tier. Parsley sometimes bolts in hot weather; keep it mulched and watered, and move to partial shade in peak summer if needed.
This small, layered herb garden will give you a reliable supply of fresh leaves, a nicer-looking balcony corner and noticeably less watering than three individual plastic pots in the sun. It’s one of my favourite weekend-to-weeknight transformations—quick, inexpensive and immediately rewarding.