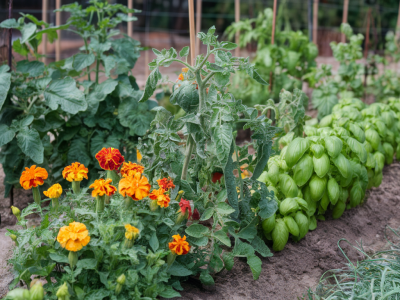
Mulch is one of my favorite garden habits — it transforms bare soil into a tidy, moisture-retaining layer, suppresses weeds and feeds the soil as it breaks down. But I’ve also learned the hard way that mulch can cause problems when used incorrectly around shrubs: too much or piled against the stems can trap moisture, encourage fungal rot and keep roots shallow. Over the years I’ve refined a practical approach that prevents rot while encouraging deeper, healthier root systems. Below I share exactly how I mulch around shrubs, why each step matters and which materials I choose (and avoid).
Why mulch can both help and harm shrubs
Mulch is wonderful because it moderates soil temperature, reduces surface evaporation and adds organic matter as it decomposes. That helps roots grow deeper and the plant cope with heat and drought. But mulch piled up against a trunk or stem creates a dark, damp environment where fungi and insects thrive. This is where rot and collar diseases start. Shallow mulch layers also encourage surface root growth because the warm, moist conditions near the soil surface are ideal for roots; those roots become vulnerable in dry spells.
My basic rule: keep mulch away from the stem and keep the layer thin but effective
When I mulch around shrubs I follow two core rules:
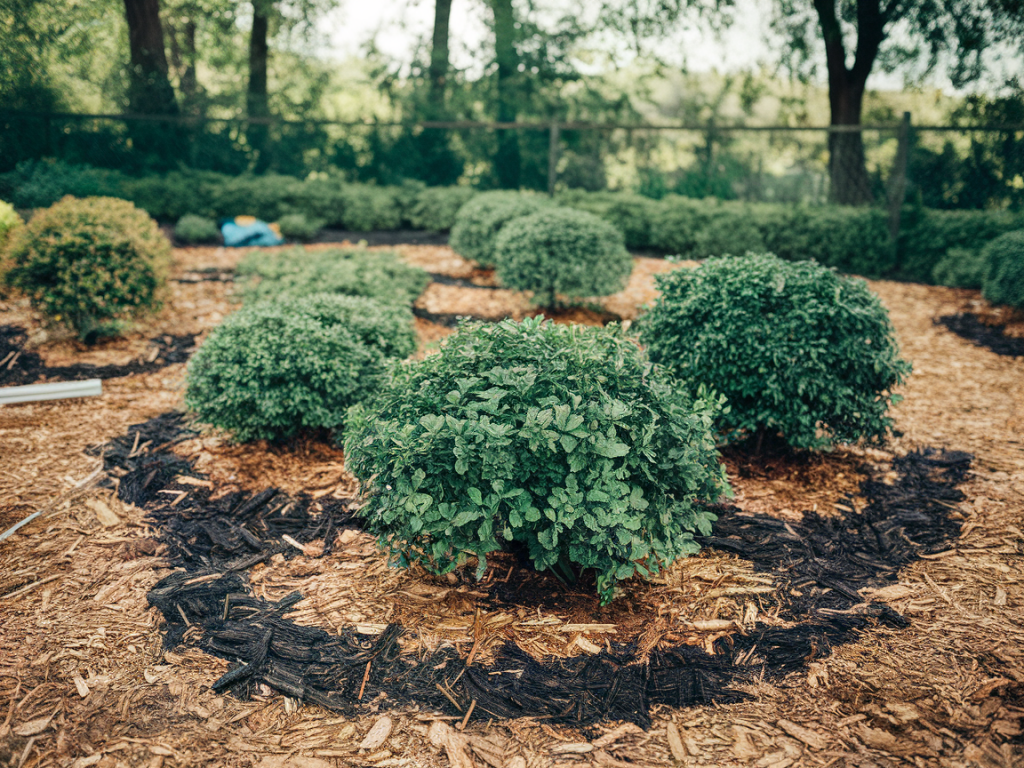
- Keep mulch 2–3 inches away from the trunk or main stems. For small-stemmed shrubs I leave a small clear space; for multi-stemmed shrubs I create a donut-shaped ring so mulch doesn't touch any stems.
- Apply 2–4 inches of organic mulch. This depth suppresses weeds and conserves moisture without creating an overly wet, oxygen-poor layer close to the stem.
Step-by-step method I use
Here’s the routine I follow every time I mulch shrubs — I’ll explain why each step matters.
- Clear weeds and old mulch. I rake away old mulch and weeds to expose the soil. Old matted mulch can wick moisture against stems and hide pests or rot.
- Check trunk flare. I look for the root collar (where stem meets roots). Mulch should not sit above that collar; if the collar is buried, I gently remove soil and old mulch until the flare is visible.
- Loosen the topsoil slightly. If the soil is compacted, I fork it gently to improve aeration and water infiltration. I avoid digging too near roots — light disturbance only.
- Create a mulch ring. I place mulch in a ring extending to the drip line for small shrubs or at least 6–12 inches beyond the root crown; for larger shrubs I match the spread of the plant. I keep a bare circle (about 2–3 inches) around the stem(s).
- Apply 2–4 inches of mulch. I spread the mulch evenly. For fine-textured mulches I lean toward 2 inches; for coarse wood chips I use 3–4 inches.
- Water after mulching. New mulch can be a hydrophobic surface; I give the area a deep slow soak to settle the mulch and help roots access moisture.
- Refresh annually. I check mulch in spring and again in late summer, topping up with a thin layer rather than adding thick new layers on top of old.
Choosing the right mulch: pros and cons
Not all mulches behave the same. I prefer organic mulches for shrubs because they improve soil over time. Here’s a quick comparison I use when selecting materials:
| Mulch type | Pros | Cons |
|---|---|---|
| Shredded bark (pine, cedar) | Long-lasting, attractive, good weed suppression, coarse prevents matting | Can be hydrophobic when very dry; low nitrogen tie-up if mixed into soil |
| Wood chips | Free from many municipalities, good for moisture retention, slow breakdown | Large chips can look rough; can form a mat if not refreshed |
| Compost/leaf mould | Adds nutrients, improves soil structure, encourages beneficial microbes | Breaks down quickly—needs frequent top-ups; can be lighter and blow away in wind |
| Straw | Lightweight, good temporary mulch for seasonally protected shrubs | Can contain weed seeds unless certified straw; attractive only in more utilitarian settings |
| Rubber mulch | Lasts decades, low maintenance | Doesn’t improve soil, can retain heat, not my choice for plant health |
Common mistakes I avoid
- Mulch volcanoes. Piling mulch against stems is the fastest way to encourage rot. I always slope mulch down away from the trunk and keep the trunk area clear.
- Going too deep. More is not always better. Five to six inches of fresh mulch looks impressive but can suffocate roots and hold too much moisture.
- Using fresh wood chips against stems. Very fresh chips may immobilize nitrogen as they decompose and can create excessively wet pockets. I let heavy wood chips age for a season before applying right up to shrub areas.
- Forgetting drainage. If soil is clayey and poorly draining, adding mulch won't fix water logging. Address drainage issues first — raise beds, incorporate organic matter or install simple drains where needed.
How mulch encourages deeper roots
Mulch helps roots go deeper mainly by stabilizing moisture and temperature in the upper soil layers. Instead of the surface drying out daily, mulch keeps a more consistent moisture profile so roots don't have to remain near the surface to chase water. Over months this encourages roots to explore downward. Pair mulch with deep, infrequent watering (rather than frequent shallow watering) to teach roots to seek water deeper in the profile.
When mulch can contribute to rot — and how to prevent it
Rot occurs when moisture and fungal spores remain on woody tissue for extended periods. To prevent this:
- Keep mulch off the stem and root flare — I cannot stress this enough.
- Prune dense lower branches to increase airflow around the crown.
- Avoid piling mulch against graft unions on roses or fruiting shrubs.
- Use coarse mulch at the base to allow air circulation and avoid matted layers; switch to compost or leaf mould a little farther out where moisture contact to stems is minimal.
- Inspect regularly in wet seasons. If you see soft, discolored bark at the base, remove surrounding mulch and let the area dry before treating further.
Specific tips for common shrubs
Some shrubs have particular needs:
- Roses: Avoid any mulch touching the graft union; leave a 2–4 inch clear space and use well-draining soil mixes in the planting hole.
- Hydrangeas: Benefit from thicker mulch (3–4 inches) to keep roots cool but still need space at the stems.
- Evergreens: Prefer coarse wood chips that allow winter thaw cycles without matted ice build-up.
- Native shrubs: Often do best with a lighter mulch of leaf litter to mimic natural forest floor conditions.
Mulching is a simple, high-impact step in shrub care when done thoughtfully. Keep the mulch ring tidy, the layer modest and clear the trunk — those small habits will protect against rot and encourage roots to dive deep, making shrubs more resilient season after season.