Late summer can feel like a strange time to move mature perennials: the days are still warm, but growth is winding down and the urge to leave plants alone is strong. I’ve moved dozens of large clumps in August and September, and when it’s done thoughtfully you can transplant mature perennials with almost no shock — often they re-establish faster than spring moves. Below I share my personal, step-by-step plan for late-summer moves so you can shift big plants with confidence and keep your garden looking full and healthy.
Why late summer works (and when to avoid it)
Late summer is a sweet spot for many perennials because root growth remains active while top growth slows. Cooler nights reduce stress, and plants have time to build a new root system before winter dormancy. I typically choose late August through mid-September for most moves.
However, I avoid transplanting during extreme heat waves or drought. If your area is having prolonged high temperatures or water restrictions, wait until conditions improve or plan for intensive aftercare (shade cloth, daily watering). Also, do not transplant woody shrubs or plants that are about to set seed — late summer can be too late for them.
Signs a mature perennial is ready to be moved
Tools and materials I always have on hand
Step-by-step plan for transplanting mature perennials
Below is the exact routine I follow. It’s written for moving a large clump within the garden, but I note variations for container plants or dividing sections.
I never dig up a plant and leave it waiting. Dig the new hole a little wider than the root ball and roughly the same depth. Loosen the surrounding soil so roots can penetrate easily. Mix in a handful of compost or leaf mould to improve structure — avoid fresh manure or high-nitrogen fertilizers that encourage top growth before roots are ready.
Give the perennial a deep watering 12–24 hours before transplanting. Moist soil holds together better and reduces root damage. If the plant is container-grown, water the pot until water drains from the base.
I remove 25–40% of the top growth. That reduces water demand while keeping foliage to photosynthesize. For tall perennials like phlox or monarda, cut stems back to 6–12 inches. For clump-formers like hostas, trim dead or damaged leaves and remove a few outer leaves to ease packing.
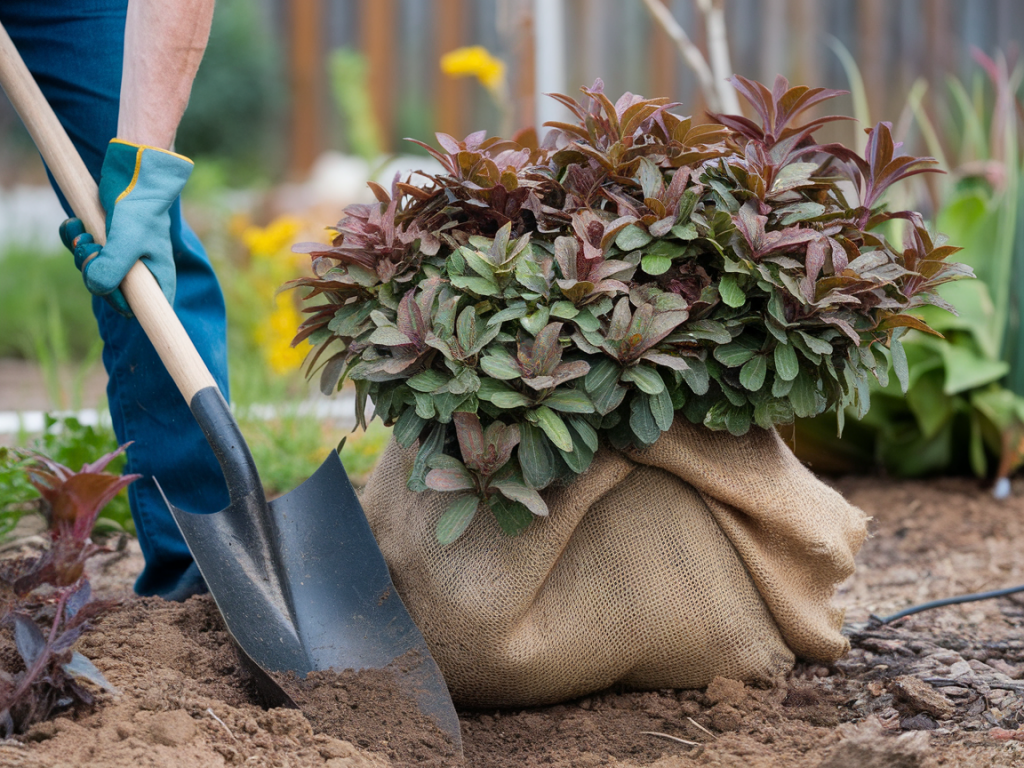
Work around the plant at a radius of at least 8–12 inches for medium-sized clumps, further for larger specimens. Use a spade to define the root ball and a fork to tease under and lift it. Where possible, keep the root ball intact with a smooth bottom — this avoids cutting too many roots. If you’re dividing, lift the whole clump and then use a sharp spade to partition into sections with healthy crowns.
For very large root balls I tuck damp burlap around the soil to keep it together, tying it gently with twine. Carry or slide the root ball on a piece of plywood if it’s heavy — abrupt jolts can shear roots.
Set the plant in its new hole so the crown sits at the same level it was previously. Backfill with the native soil mixed with some compost, firming gently to remove air pockets. Avoid planting too deep; this is a common cause of transplant failure.
Immediately soak the planting area until water drains away. Add a 2–3 inch layer of mulch, keeping it a few centimeters away from the crown to prevent rot. Mulch moderates soil temperature and conserves moisture — crucial for late-summer moves.
If the forecast shows hot days after transplanting, prop up a temporary shade using bamboo poles and a light fabric or shade cloth for 3–7 days to reduce stress.
Aftercare: the first 8 weeks
Common mistakes to avoid
Troubleshooting quick reference
| Problem | Likely cause | Quick fix |
|---|---|---|
| Leaf wilting after move | Transient shock / insufficient water | Deep soak, shade for a few days, check soil moisture daily |
| Yellowing leaves | Overwatering or root damage | Improve drainage, reduce watering, remove rotten roots |
| No new growth in 6–8 weeks | Poor root establishment or planting too deep | Lift gently to inspect; correct depth and amend soil as needed |
I often use a seaweed-based root booster after moving very large plants — it’s gentle and stimulates root growth without forcing leafy growth. Brands like Maxicrop or Neptune’s Harvest are good options. For soil improvement I reach for well-rotted compost or my own leaf mould; these add structure without over-fertilizing.
Transplanting mature perennials is a little like surgical gardening: careful prep, a clean lift and thoughtful aftercare make all the difference. With the right timing and a calm routine you’ll see your big plants settle in and resume healthy growth — sometimes with renewed vigor. If you have a particular perennial you’re nervous about moving, tell me what it is and where it’s going and I’ll share tailored tips from my own garden experiments.