I remember the first summer my patio tomato plants started showing small, sunken brown patches on the bottoms of the fruits — maddening when you’re nursing container tomatoes through heat, water and pruning. That problem was blossom end rot (BER), and once I learned to treat the cause instead of just removing the ugly tomatoes, my containers produced healthy fruit again. Below I share the practical, container-specific steps I use to stop BER and keep tomatoes productive.
What blossom end rot is and why it happens in containers
Blossom end rot is not a disease or a fungal infection — it’s a physiological disorder caused by a localized calcium deficiency in the developing fruit. The tricky part is that the soil or potting mix may have plenty of calcium overall, but plants still show BER when they can’t absorb or move that calcium to the fruit. In containers this is often due to:
Because containers heat and dry out faster than beds, and because root volume is limited, tomatoes in pots are especially vulnerable. The good news: with focused steps you can correct the imbalance and prevent more rotten fruit.
Seven practical steps for container growers
- Remove affected fruit and don’t panic. Cut off tomatoes with blossom end rot. They won’t recover, and leaving them uses the plant’s energy. Removing damaged fruit helps the plant focus resources on healthy fruit development.
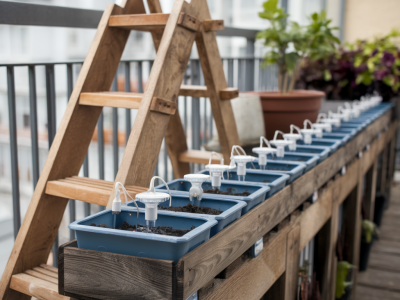
- Stabilize and schedule watering. Inconsistent moisture is the single most common trigger. I water on a schedule rather than by guesswork: deep watering twice a week for large containers in hot weather, more often for small pots. Use your finger or a moisture meter to check the top 5–10 cm (2–4 inches). The goal is consistently moist but not waterlogged soil. A layer of 3–5 cm (1–2 inches) of organic mulch (straw, shredded bark) on top of the potting mix helps slow evaporation and smooth out fluctuations.
- Improve potting mix and container size. If you used old garden soil or a cheap, compacting mix, repot into a light, well-draining container mix with compost and perlite. Tomatoes prefer at least a 20–25 litre (5–7 gallon) container for determinate varieties and larger for indeterminate vines. I often repot in spring into mixes like a 50/30/20 blend of high-quality potting soil, compost, and perlite or coconut coir.
- Give a calcium boost—smartly. If BER has already started, a targeted calcium supply helps the plant deliver more calcium to developing fruit. Two safe options I use:
- Foliar calcium spray: Use a labeled product containing chelated calcium or calcium chloride and follow directions. Foliar sprays can help quickly deliver calcium to young fruit tissues. Spray in the morning when temperatures are cooler to reduce leaf burn risk.
- Soil-applied calcium: Add a soluble calcium fertilizer like calcium nitrate or gypsum to the potting mix or as a drench. Calcium nitrate also supplies nitrogen, so use it cautiously if your plants are already lush and green. Gypsum adds calcium without changing pH much.
- Avoid overfeeding with high-nitrogen fertilizers. Excess nitrogen promotes leafy growth and can make BER worse by diverting resources. Switch to a balanced or phosphorus- and potassium-focused fertilizer once fruit sets begin — look for formulas like 5-10-10 or similar. Slow-release granular fertilizers and organic options (worm castings, compost tea) give steadier nutrients and reduce sudden surges.
- Check pH and salt levels. Calcium availability drops when pH is too low (<6.0) or very high. Tomatoes prefer a slightly acidic range around 6.0–6.8. If you suspect pH issues, test the potting mix with a simple kit. If pH is low, add lime carefully following label rates; if it’s high, use acidifying amendments like peat or sulfur slowly. Also flush containers occasionally (a heavy watering to run off 10–20% of water) to reduce salt buildup from fertilizers.
- Strengthen root health. Healthy roots move calcium better. Avoid root crowding (repot if root-bound), and be gentle when trimming or training. I also use a low-dose mycorrhizal inoculant or a beneficial root bacterial product early in the season to improve root uptake in new containers. If transplanting, don’t disturb roots more than necessary.
Quick reference: calcium sources and how I use them
| Product/type | When I use it | Notes |
|---|---|---|
| Foliar chelated calcium spray | When BER first appears | Quick short-term fix; apply mornings; follow label |
| Calcium nitrate | When soil calcium likely low and plant needs steady supply | Water-soluble; adds nitrate — avoid if plants already high N |
| Gypsum (calcium sulfate) | If you want calcium without changing pH | Slow-acting; good for long-term correction |
| Bone meal | At planting for slow calcium release | Slow, and depends on soil biology; not a quick fix |
Practical tips I’ve learned from trial and error
When blossom end rot still occurs despite fixes
If BER continues after doing the steps above, re-evaluate container size (bigger is better), replace the potting mix entirely, and check for root damage or hidden stressors such as nearby herbicide drift or extreme heat exposure. Sometimes a persistent problem points to chronic root restriction or a potting mix that binds calcium tightly. In those cases repotting into a fresh high-quality mix and increasing container volume often ends the cycle.
Fixing blossom end rot in containers is mostly about steady moisture, adequate calcium availability, and healthy roots. Once you get the routine right, you’ll stop spotting the telltale sunken brown ends and start harvesting more whole, tasty tomatoes from your pots. If you want, tell me about your pot sizes, the mix you used and how you water, and I’ll suggest a tailored plan.