I’ve been collecting rainwater for years, but one summer I noticed mosquito larvae wriggling in my old barrel—and I realized I needed a better system. I wanted something simple, budget-friendly and made mostly from upcycled parts that would both keep mosquitoes out and deliver relatively clean water straight to my raised beds. After a few prototypes I settled on a compact, easy-to-build rain barrel filter that sits under your downspout, filters debris and diverts the clean water into your irrigation line or a watering can. Here’s how I build mine and what I’ve learned along the way.
Why build an upcycled rain barrel filter?
Collecting rainwater saves on the water bill, reduces stormwater runoff and gives plants softer, chlorine-free water. But raw gutters carry leaves, grit and bird droppings—and still water breeds mosquitoes. A simple filter solves those problems. By upcycling a few common items you’ll keep costs low and give useful objects a second life.
What this design does
The filter I describe below does three main things:
- Blocks leaves and large debris with a gutter guard and inlet screen.
- Settles out finer particles in a debris chamber so clearer water flows out.
- Excludes mosquitoes with a tight-fitting, fine-mesh outlet and one-way valves to prevent backflow and standing water exposure.
Materials and tools (mostly upcycled)
Here’s what I use. Many items come from thrift stores, salvage yards or your recycling corner.
| Item | Purpose |
|---|---|
| Food-grade plastic barrel or large bin (60–120 L) | Main collection/filter chamber |
| Old plastic jug or 5 L can | Secondary sediment trap or first-flush diverter |
| Fine stainless steel or nylon mesh (1 mm or less) | Inlet/outlet screens to keep mosquitoes out |
| Silicone sealant / waterproof adhesive | Make watertight joins |
| Bulkhead fitting or hose barb (20–25 mm) | Outlet to garden hose or dripline |
| Piece of old downspout or flexible gutter connector | Feed rainwater into the filter |
| Fine gravel, coarse sand (optional) | Secondary filtration layer if desired |
| One-way valve or float valve (optional) | Prevent backflow and reduce standing water |
Step-by-step build
I build mine on a small wooden platform so the outlet is elevated for a hose connection. The process is forgiving—adapt parts as you find them.
1. Prepare the barrel
Clean any residues out of your barrel. Drill a hole near the bottom sized for your bulkhead fitting or hose barb. Install the fitting with plenty of silicone sealant to avoid leaks. If you’re using a used food barrel, give it a good soak with a diluted vinegar solution and rinse well.
2. Make the inlet and first-flush trap
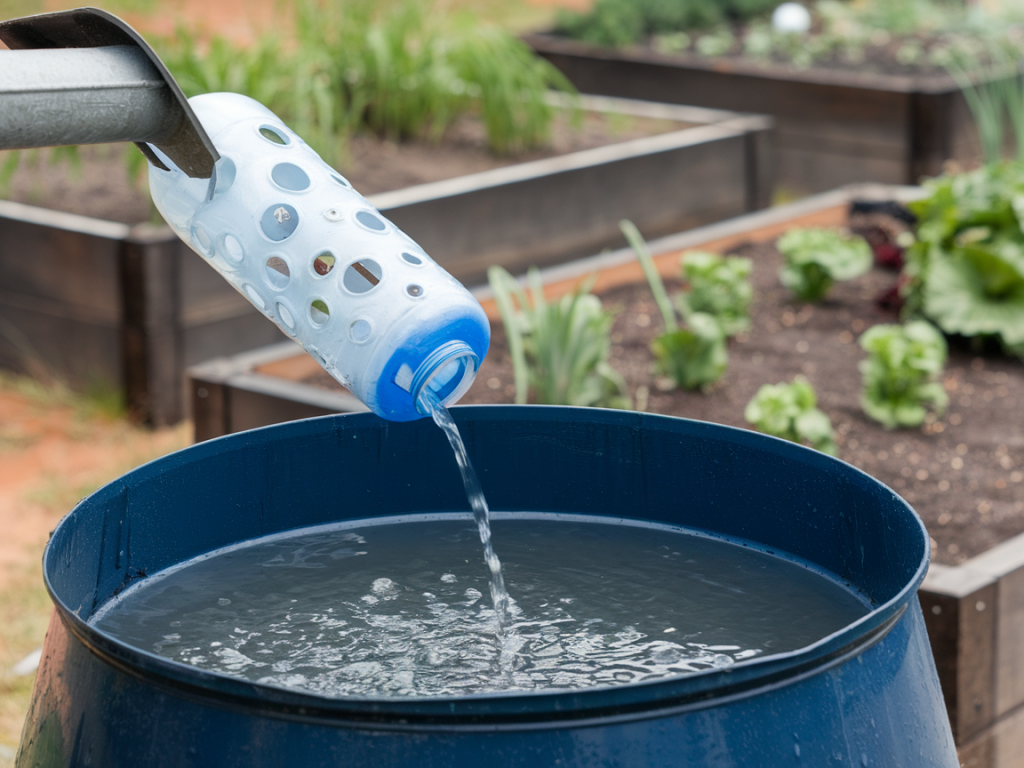
I like to keep the first dust and leaves out of the barrel by creating a simple first-flush trap. Cut the top off a 5 L plastic jug and glue a short section of downspout to it, so the first heavy flow fills the jug and then diverts cleaner water into the barrel. Add a plastic plug in the jug’s bottom with a small hole that slowly drains to the soil—this keeps the worst debris from ever reaching the main barrel.
3. Fit the inlet mesh and splash plate
Over the barrel’s fill opening, fix a fine mesh screen to stop insects and small debris. I often use stainless mesh from an old window screen or nylon mesh from a kitchen sieve. Under the mesh I attach a plastic splash plate (an upcycled cutting board works nicely) to spread the flow and reduce scouring that would stir up sediment.
4. Add a settling chamber (optional but useful)
If your barrel is large enough, I recommend placing a partition inside to create a settling area at the bottom. You can use a repurposed bin wall or a sealed plastic sheet attached to the inside. This encourages heavier particles to drop out of the water column before it reaches the outlet.
5. Secure the outlet with mesh and valve
Screw your bulkhead or hose barb into the prepared hole and cover the outside of the fitting with fine mesh. I run the mesh over the fitting and clamp it in place with a hose clamp or plastic tie, then seal with silicone. For extra mosquito protection add a small one-way valve on the outside so nothing can swim back into the barrel from the hose.
6. Optional gravel/sand polishing layer
If you want clearer water for drip irrigation, add a layer of clean gravel and coarse sand on the bottom under a removable tray—this acts as a simple polishing filter. Make sure the tray is removable so you can clean it periodically.
Connecting to raised beds
I feed my raised beds with a small hose connected to the barrel outlet. For drip irrigation, use a 16 mm micro-hose with barbed fittings and a pressure reducer. If you prefer hand-watering, simply attach a short hose and fill a watering can from the spigot. I also keep a screened overflow hose to divert excess during heavy storms.
Maintenance and winter care
Routine maintenance keeps the system working and prevents mosquitoes:
- Check the mesh and gutters monthly during the rainy season—remove leaves from the inlet screen.
- Empty and clean the first-flush jug after heavy storms.
- Flush the barrel occasionally by opening the outlet and letting sediment rinse out into a compost area (not into storm drains).
- In cold climates, disconnect and store the barrel indoors or drain it and insulate it to avoid freeze damage.
Health and safety notes
Rainwater is excellent for plants but not potable without proper treatment. I use collected water only for irrigation and outdoor cleaning. Avoid using rainwater for edible crops if your roof has lead flashing or if you have concerns about airborne contaminants—collect from a clean roof when possible, or use barrel water only for ornamentals.
Troubleshooting common problems
Here are some things I’ve encountered and how I fixed them:
- Mosquitoes still present: Check for gaps in the mesh or around fittings. Replace with finer 1 mm stainless mesh and re-seal joints.
- Clogged outlet: Install a small removable strainer at the inside end of the bulkhead or use a short vertical pipe inside the barrel so the outlet draws from a clearer layer.
- Bad smell or algae: Keep the barrel opaque (paint it or wrap it) and clean annually. A floating lid or tight top reduces light and prevents algal growth.
Upcycling ideas and variations
One of my favourite parts of this project is how adaptable it is. I’ve built versions from:
- Old wine vats cut down to barrel height for a very tidy garden feature.
- Stacked plastic crates with a liner for a low-cost modular system.
- Metal drum with a food-grade plastic liner when I needed something more robust for a sunny spot.
Brands I’ve found useful for fittings and valves include Gardena and Rainwater Harvesting Ltd for bulkhead fittings, but you can get suitable parts from any hardware store or online marketplaces.
If you want, I can sketch a diagram of the layout you could follow or adapt a parts list based on the exact barrel size you have. I love seeing clever upcycles—tell me what parts you have and I’ll help you adapt the plan for your garden.